Image 1
In the shown pop up(check Image 2 below), select Sport(3). The sport you selected when creating your profile will be your default sport. You can change it in your Account settings. After selecting sport, click the “Create(4)” button.
Image2
You will be redirected to Create Tournament Form. In this page, you will need to enter the necessary information for the tournament:
A. Tournament Name
-
Tournament Name( *required)
B. Ranking
-
Select Ranking(optional)
C. Dates
-
Close Sign In Date( *required)
-
Start Date( *required)
-
End Date( *required)
D. Regulations(optional)
E. Club / Organizer + Online Payment Recipient( optional)
F. Location
-
Name
-
Country( *required)
-
City
-
Address
G. Courts(optional)
-
Name
-
Location Name
-
Country
-
City
-
Address
H. Advanced(optional)
-
Live Streaming Info
-
Ask for Consent
-
Payment
A. Tournament Name:
The name will appear on the event page, event poster, players can search the event by the name in the search bar and also the event will appear in the Calendar page.

B. Ranking:
In this step you can add a Ranking for your tournament. In this way, players will get points for their final standing position and the points will be accumulated in the Ranking. This is optional, you can run the Tournament without a ranking, but in the end the players will get only their final position without points. If you want to add a ranking, click the “Select Ranking” button, search for your ranking, select it and then click “Confirm”. If you haven’t created a ranking yet, you should create it before you add it in the tournament. To create Ranking follow these instructions

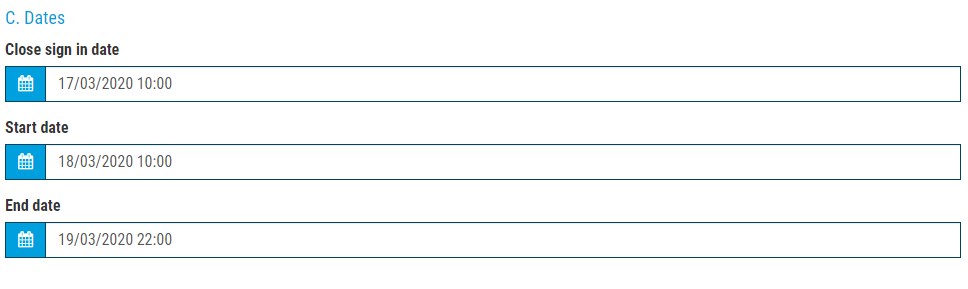
C. Dates:
-
Close sign in date: This information is used only to inform the players about the date and time when the Tournament admin plans to close the sign in. Just to note, that the process of closing the sign in is not automatic, the admin needs to do it in step 5.Close Signin In
-
Start Date: This information is used to inform the players about the start date and time of the Tournament.
-
End Date: This information is used to inform the players about the end date and time of the Tournament. Also if you have connected a Ranking to the Tournament, the points will start counting in the Ranking, starting from this date.
D. Regulations:
Here you can add details about your Tournament.

E. Club / Organizer + Online Payment Recipient:
Here you can add your Club/Organization that is organizing the Tournament. Also you can collect tournament fees online very easily. In order to collect online payments, you must have an active Stripe account. If you want to learn how to setup your Stripe account and integrate it with Rankedin please check the User Manual
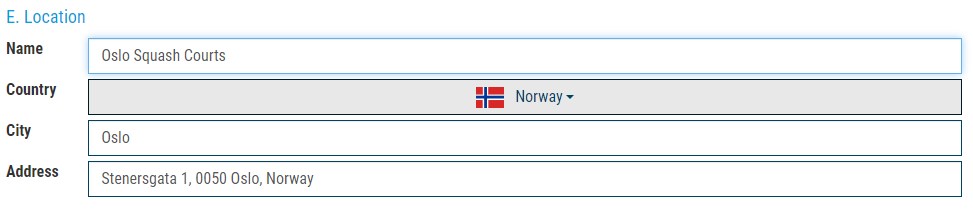
F. Location
-
Name: Information about the name of the location, for example “Oslo Squash Courts”. Shown on Tournament Page.
-
Country: Selecting Country is required. This information is shown on the event page. It can also be used to filter events by Country in the calendar page
-
City: This information is shown on the Tournament page
-
Address: This information is shown on the Tournament page
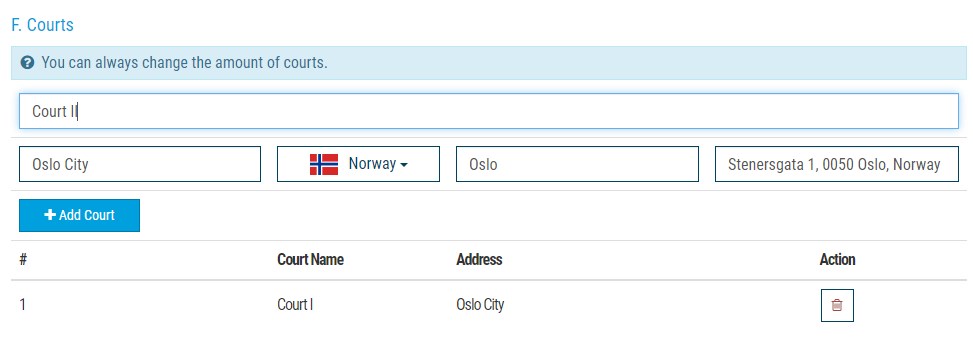
G. Courts
Adding courts for the tournament is optional. Courts are required if you use our “Schedule Matches” feature. Schedule Matches feature adds time and court for every match in your tournament. You can add more or delete existing courts at any time.
H. Advanced (optional)
-
Live Streaming Info: If this option is selected, a “Planned” label will be added in the tournament page and in the calendar next to the tournament name. This information is used to inform players that the tournament is planned to be streamed live using SportCam App
-
Ask for Consent: This option is to facilitate the collection of the player's personal information, such as phone number, email and date of birth. Once selected, a permission request is sent to each player upon sign in to the tournament. This personal information and other data pertaining to the players can be downloaded in Step 4. "Players"
-
Payment: When this option is selected, the admin can add Stripe, Cash, or Bank Transfer. If you want to use Stripe, you will need to set up your Stripe account and connect with Rankedin and receive the funds after each player has joined the tournament.
If you want to learn how to set up your Stripe account and integrate it with Rankedin please check the User Manual.
When Stripe is selected as a payment method, each player will have to pay using Stripe in order to join the tournament. If cash or Bank Transfer is selected, players will be able to join the tournament without payment. They can later pay with cash etc. and the admin can manually mark the payment in step “4.Players”.
After entering all necessary information, simply click the “Create” button at the bottom of the page and you can continue with the rest of the settings.