“Schedule Matches” is a key feature that helps you organize the tournament. Using the “Schedule Matches”, the admin will add a time and a court for each match of the tournament. Players’ matches, including playing times and court number, will be visible on their profile. The “Schedule Matches” feature requires you to first:
-
Add Courts in “1.Edit” step
-
Set the times settings in “7.Times” step
-
Schedule Matches in “8.Matches&Video” step
Important: In order to schedule the matches, at least one court needs to be added in the tournament. Check “Create Tournament” section “F. Courts” to see how to add courts in the tournament.
To configure the time settings for the schedule, open the tournament admin panel and select step “7. Times”. “Playing dates” (1) is a list of dates selected for all Classes in step “3.Classes”. You need to set the time settings for each playing date. “Start Time” (2) is the starting time for the matches of the selected date. “End Time” (3) is the end time of the matches for the selected date. The “Scheduler” will add a time for all matches within the range between “Start Time” and “End Time”.
Next setting is “Courts Per Day” (4), that definins the number of courts that will be used for the selected date. “Match Duration'' (5) is the time dedicated for a single match to complete. “Minimum Break”(6) defines the break time guaranteed for each player after finishing a match.

-
Advanced Times Settings
In the advanced times settings section, the admin can decide the order in which the classes are scheduled, by clicking the “Arrow Buttons” (2). The class on the top is scheduled first in the Timetable, meaning they will play their matches first. Admin can also set the number of rounds per day. In the “input field”(1) you can enter the number of rounds for that specific day. Please note that the last input field is always set to “Max”, which means that all remaining rounds will be set on the last day.

Once the Times Settings are done, admin can continue to the next step, “8.Matches&Video”.
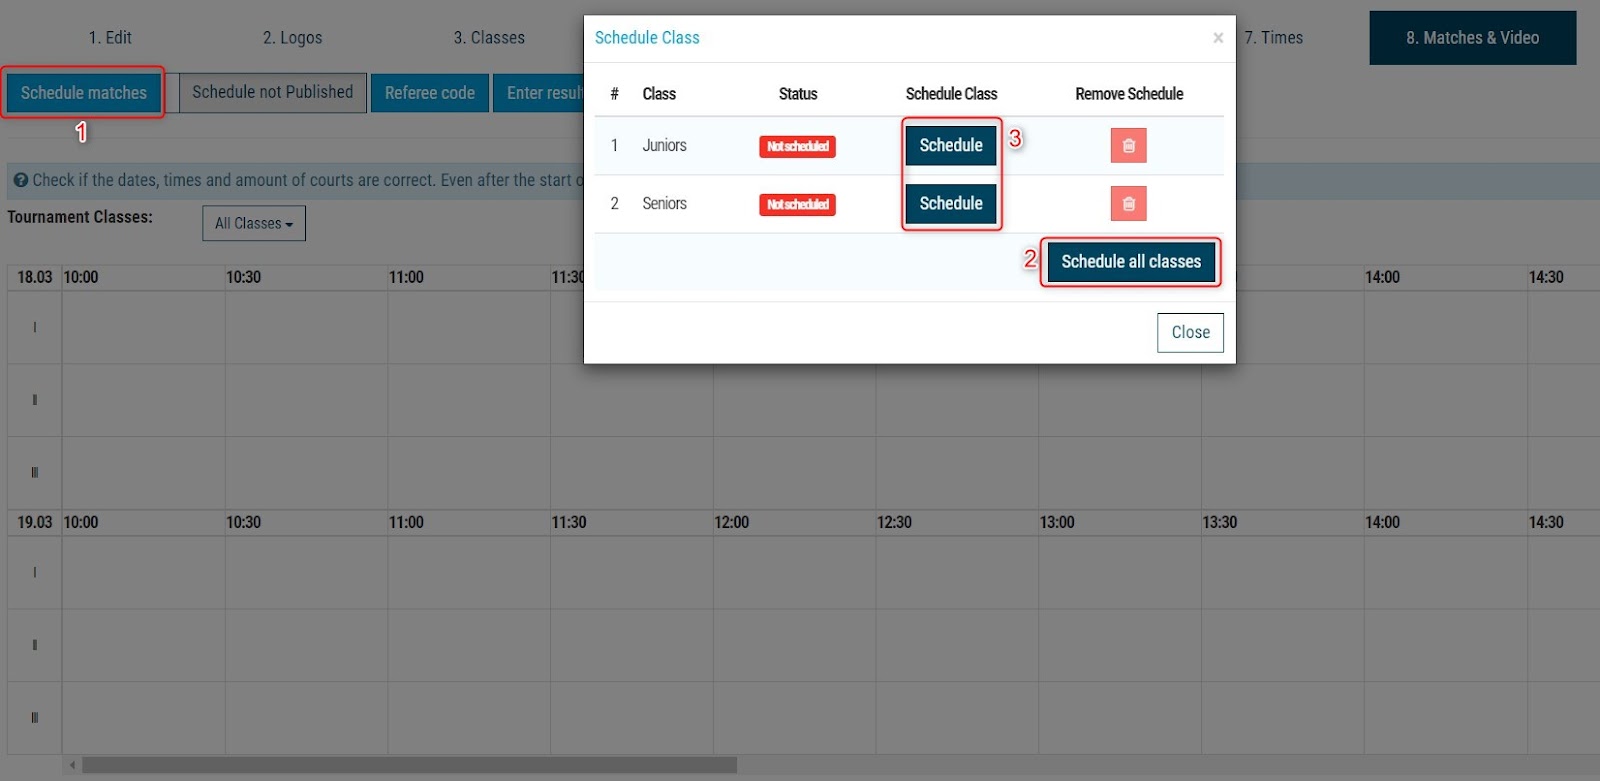
To schedule the matches, simply click the “Schedule Matches” (1) button. From the pop-up, you can select “Schedule all classes” (2) or select a specific class to be scheduled (3).
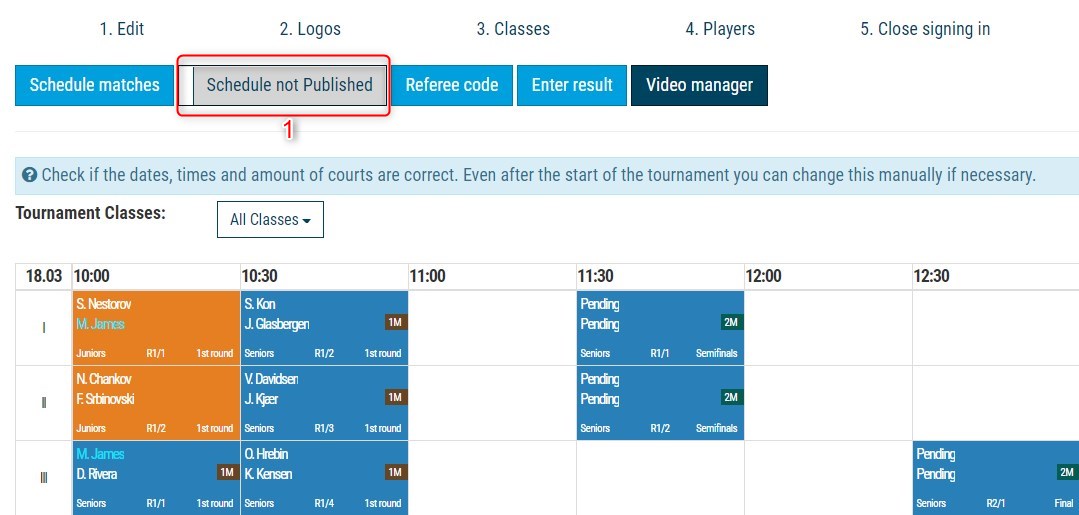
In this example the matches in the timetable starts with “Juniors class (orange)” because of the order selected in advanced settings. Juniors class is set as 1st class to be scheduled. For the 1st day, Juniors play only one round because of the “Rounds per day(1)” setting, in advanced settings.

At this point, courts and times are only visible for the admin. For the courts and match times to become visible for all players, the admin needs to publish the schedule. To publish the schedule, click the “Schedule not published” (1) button and confirm it in the pop-up.
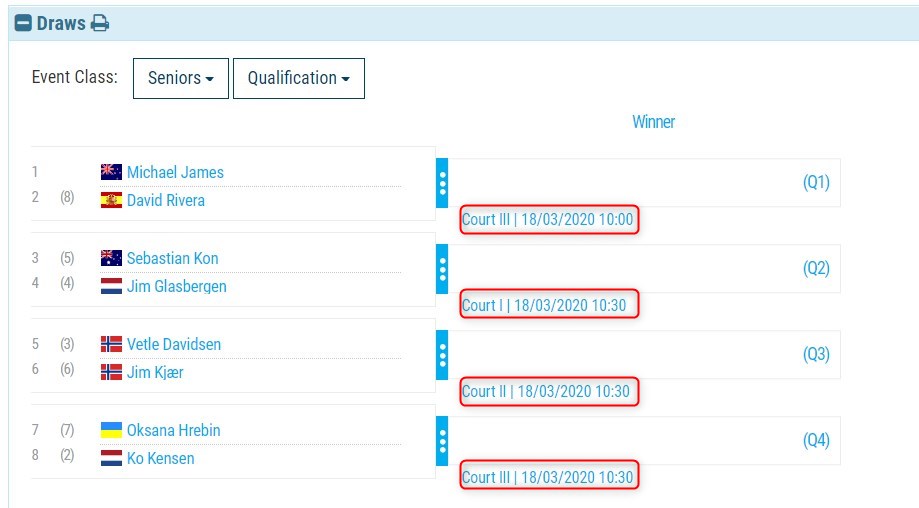
After publishing the schedule, courts and match times are visible in the Draws and at the “Matches” section on the tournament page.